
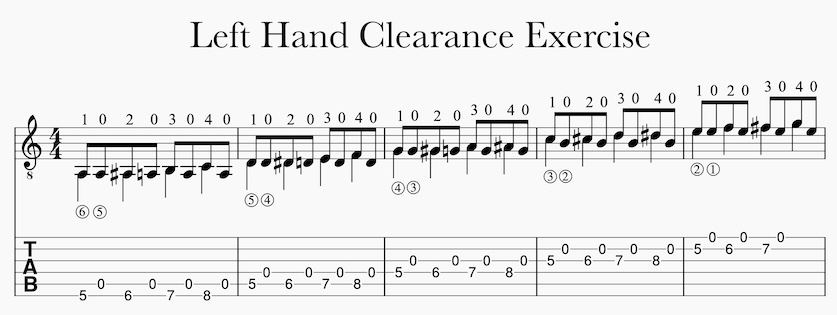
Left Hand String Clearance Exercise – This exercise helps students play with curved fingers on their fingertips which helps with all left hand techniques. It also creates a situation where the student becomes aware of bad technique habits by listening to the open string sustain. It’s so simple and effective that I assign it to all my classical guitar students. It’s a basic four finger placement exercise with open strings below.
- Play the left hand fingers 1-2-3-4 on one-finger-per-fret.
- After each finger play the open string below.
- This will create a situation to check your clearance ability with each finger because if you are not on your fingertip you will accidentally mute the open string.
- Start in the 5th position but once you feel confident play it at all frets to check your clearance.
Tips and Lessons Regarding Guitar Position
It’s always important to first check your guitar position.
Practical Tips for Left Hand Clearance
Guitar Position: Double check your guitar position making sure the headstock is around eye level. This might seem a bit high but it’s a general guideline. You can see my Guitar Position Lesson and also my Q&A on Headstock at Eye Level.
Tilt the guitar – Tilt the face of the guitar to a steeper angle (up and down rather than leaning toward you on the upper bout). This is the advice in the video at 10:18 above.
Left Hand Lesson – See my full lesson for the left hand here: Left Hand Position for Classical Guitar.
Play on the tip of the fingers – Playing on the tip of the finger is important but the other factors mentioned in the video are essential to the solution. Playing on the fingertips alone will not necessarily result in enough clearance.
Align the knuckles of the left hand – The left hand must be aligned with the strings otherwise the fingers will come in at an angle which reduces clearance of the strings below. This is more relevant to the 4th finger but still applies to all fingers. This will result in angled fingers on finger 1 and 4.
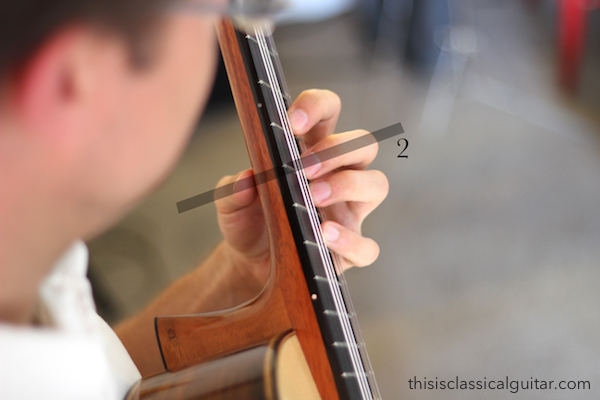
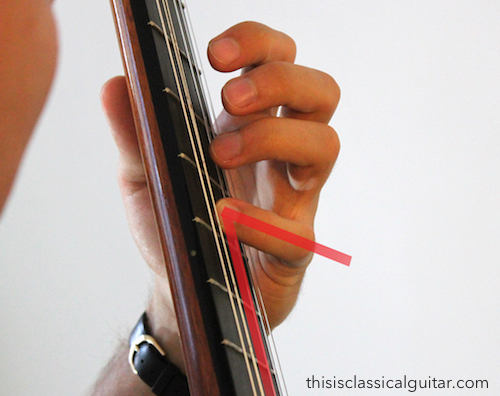
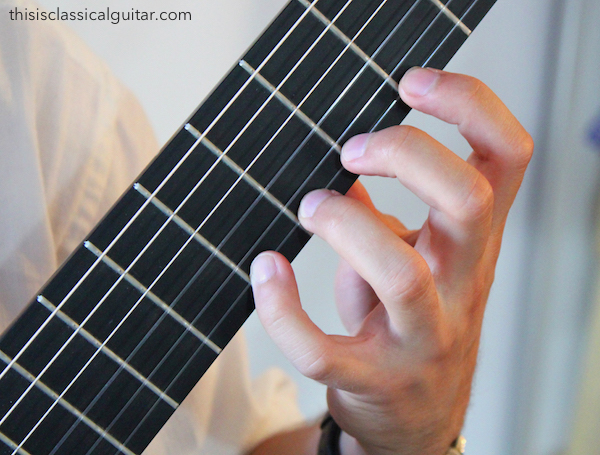
Curve the fingers – You must also have the neck of the guitar up high enough that you can curve your fingers properly.
A = Curvature at the tips joint
B = Curvature at the middle joint
C = Curvature at the knuckle
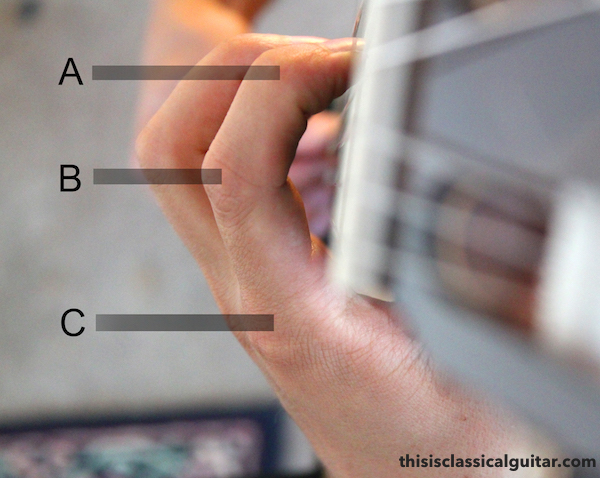
Check this this lesson on: 6 Common Technique Problems Solved with a Better Guitar Position (video below). My biggest piece of advice for this issue in presented in the this video, all the advice in this video is relevant, but specially see the video at minute 10:18.
Check out my full technique book with videos
Classical Guitar Technique: Essential Exercises, Scales, & Arpeggios – 122 pages with tons of video lessons.





This is something that I am struggling with at the moment. I am playing the Villa Lobos prelude 1 and always have a problem with bars 34-40. Starting at twelfth pos, the 3rd and 5th fingers have to go up and down by one fret on the 1st and the 3rd string whilst leaving the 2nd open…you know the bit. My 3rd finger always starts ok then the string slips and I find my finger fouling the open 2nd string. It is driving me nuts! I am often ok at the start of a practice session then the problem starts to appear. Do you think it is because my muscles are weakening as I practice, because my fingers are getting slippier as they warm…or something else entirely?
The usual correction is small adjustments to a number of places. My students often underestimate the guitar angle (as in the upright or tilt factor of the top of the guitar). These small adjustments can be the few millimetres needed to clear the string.